
Showing posts with label Things Made of Wood. Show all posts
Showing posts with label Things Made of Wood. Show all posts
Thursday, December 20, 2012
Wednesday, July 4, 2012
The Daily Grind(er)
The grinder design I showed 2 days ago didn't work out too well. The path from the grinding mill exit to the removable cup with the grounds proved to be not steep enough.

Here's version II. It works much better.

 |
| The cup easily holds the full capacity of the grinder. |
As you can see, after investigation I found that the mill section could be of a smaller diameter. Thus it's even easier to hold. By making the "cup" for the grounds in a direct line and the same diameter as the mill exit the solution is far superior to the "square drawer" of conventional grinder designs. They tend to leave coffee grounds on the drawer edge and the round shape makes it easier to pour into the usually round coffee maker.
This unit is made of 4 cedar parts. All made with hole saws, but it could easily be turned from a single block on lathe.
Monday, June 25, 2012
Toolbox No. 4 : Bicycle Tools
I was just about to sell my bike tools when I rediscovered bicycling. To celebrate I cleaned off my tools and gave them a new home.


Each of my toolboxes has started from a central idea. This one was to provide customized storage for the specialized, skinny, Park tools. To this end, the lower tool drawer has 1/8th" slats that these tools nest between
Some features of interest. I have a couple of 1/4" socket sets, but I could never for the life of me imagine what one would use a 4mm socket for. Now I know; they make great drawer pulls.
An old handlebar was used for the handle.
The visible wood is maple, but pine, fir and plywood were also used. What ever scrap was around. The upper tray dividers are of cedar.
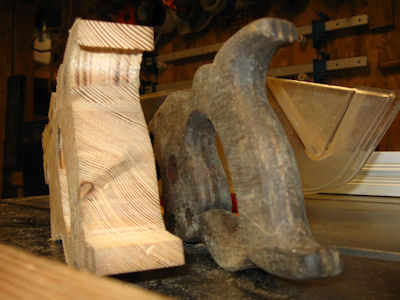
Tuesday, May 15, 2012
Bench Test
Alice had been looking for a particular piece of furniture for office. Ideally it had to be: 1 foot tall, to clear the glass partition to her neighbors cube; 3 feet wide, to span the opening; and 9" deep to accommodate plants. She had seen a couple of Asian designs that she liked, but they either weren't quite right or expensive and mostly both.
We liked the design of this little stool, but it was obviously not wide enough. I had Alice snap this picture and committed to building one based on its characteristics..

Accused of having a tendency to repair things too well (i.e. taking the quirkiness and "character" out of them in the process of making them function better), I thought this might be a chance to prove I was capable of building something without sanding the history out of it.
I have had a bread board, which I believe I purchased between plays while antiquing with my mother at Niagra-on-the-Lake decades ago. It measured a bit less than the requisite 3 feet, but the main surface was cracked in the middle and at 75 or more years oldit had plenty of character.
So here it is. It used up almost all the wood and the only other material was for the drawer.


And here it is in Alice's office.

Sunday, January 15, 2012
Sand Box
For years I have been continually frustrated by all my attempts at storing sand paper. Of late I tried creating dividers in a milk crate, but invariable the paper would slump to the bottom and the whole box would be a mess with the 5" sanding discs for the electric sander. I've had a design for a box in mind for quite some time, but just now had some time to slam it together.

It's a hefty box with 7 1-inch drawers each holing the rectangular and round papers of each grade. Usually 60, 80, 100, 120, 150, 220, 600. A place for the sander, sanding block and a some odds and ends on top. The handle folds down. The drawer faces were cut from a single piece of salvaged Doug fir. The drawers glide on their bottoms into dado cut channels on the side
It still needs some drawer knobs (maybe?), but it's already functional and a big improvement.

 |
| Found these very small brass card pulls at House of Antique Hardware |
It's a hefty box with 7 1-inch drawers each holing the rectangular and round papers of each grade. Usually 60, 80, 100, 120, 150, 220, 600. A place for the sander, sanding block and a some odds and ends on top. The handle folds down. The drawer faces were cut from a single piece of salvaged Doug fir. The drawers glide on their bottoms into dado cut channels on the side
It still needs some drawer knobs (maybe?), but it's already functional and a big improvement.
More Cutting Boards
I've been meaning to make more cutting boards. Having a few, thinly cut strips of wood left from doing the sand box I decided to glue them up to some walnut. But the resulting board was smaller than I wanted. The walnut stock I had was cut to about 2"x3" and I thought it might look good to suspend the laminated portion between end caps that would serve as massive feet. The result...
I was very pleased with the look and quickly made two more. I have a fourth one that is even more ambitious in the final gluing stage now.

 | ||
| Back: Light wood for both was from a single 4x4 x 3' old growth, vertical grain Doug Fir. Front is salvaged Doug Fir. |
I was very pleased with the look and quickly made two more. I have a fourth one that is even more ambitious in the final gluing stage now.

Tuesday, December 27, 2011
My First Katana

For anyone attempting to do this I am eternally indebted and can't recommend highly enough the video series from DAPiratecaptain, Wooden Katana Tutorial. I unfortunately didn't have the time to make all the various components of the sword the way he demonstrates, And while it was my first attempt and many mistakes were made, I nonetheless have four alternative methods to DA's that I would like to share
THE BLADE
For the Katana I wanted to mimic the folded steel with the wooden analog, lam ination. I also wanted the blade to be stong but light. . I chose to make it out of two thin pieces of maple bonded to a walnut core.
 |
| Finished, but unpainted blade. |
The process for making this was to first bond a strip of walnut 1/4" to 1/2" thick, to a chunk of maple. I first cut off a 1/2" piece of the maple to use as the other side of the blade.Once the glue has set (Tightbond 3 is 24 hours), I ran the strip through a table saw to get it down to 1/8" or less (as shown below)..
 | |
| Walnut bonded to maple. I thought the width of the walnut was closer to the 2" of the maple. If I'd had more time I would have laminated two pieces of walnut together to make up the gap. As it was, this left me with not enough width to get the full curvature I was after. |
I then ran the whole thing through a planer, walnut edge up, to take it down to its final dimension. I was aiming for 1/16th, but it might be a hair less. I then glued the reserved piece of maple to the walnut (reversing the maple so that the warping forces would be counteracted).
After it was bonded, I ran the whole thing through the table saw to get the maple down to rough final dimensions. Then the whole thing through the planer to get the blade down to the final thickness.
This produced a light, stiff, tough blade that was not initially as straight as I'd expected, but after much sanding the blade seems to be stabilizing.
BLADE SHARPENING
The compound blade can withstand a lot of torque. To get the edge I placed or clamped a full sheet of sandpaper to the bench, placed my left hand on the blade applying force as if I were trying to keep the blade parallel to the paper. In the photo my right hand is twisting the blade counter-clockwise toward the sandpaper creating a very low angle and hopefully a uniform edge.

Since the blade is hardwood it takes a large grit and a lot of work to get an edge. I think I started with 6o, then 100, 150, 220, 600.
HABAKI
For the habaki, I used a scrap bit of 1-1/4" plumbing pipe. It's chrome, but that comes off to reveal the brass and is easily polished. I simply squeezed it in a vice till it formed an oval of roughly the right dimension. Then I cut off the excess from one end and squeezed it into place.

SAYA
The saya is made in the 3-part method with a top, a bottom with the middle being a cutout using the blade as a pattern. However, I prefer to glue the middle to one side, shape it and then cover it up instead of gluing all three pieces at once.. This has several advantages:
- You can visually see the edge margin when getting down to the final form.
- There is the opportunity to sand the interior before final fitting.
- The top can be cut to near the exact final dimension.
 |
| The sward is visible in the background. The cutout is glued to the bottom piece of wood. Wax paper is then laid over top and the cutout placed back in the center. The glue won't stick to the wax paper. |
ONE HAPPY SAMURAI

Saturday, December 24, 2011
New Shop, New Bench
When Alice and I were shopping for a house one of my criteria was a refuge for myself. Of course, I have my "Fortress of Solitude"in the country, but that won't last for ever. And so I've been busy converting the garage into a workshop.
In the basement of the house we purchased together some 3 years ago now, we found this:

The top being made up of 3 chunks of vertical grain fir about 3-1/2" thick, 11 inches wide and 7-1/2'long.
They have become this:

The planks have been planed down to exactly 3.5" giving them a new surface and making them the same height as my compound miter saw (which sits in the gap between slabs. With the 2-foot runout on the end the bench is just shy of 9 feet.
If it looks unsteady it isn't. Although I plan to add cross bracing, the whole frame is clamped together using just three 1/2-inch threaded rods. The tension keeps everything quite rigid and the weight of the fir is substantial.
Monday, September 19, 2011
Mid-Century Modern & Me
Our home in Portland has a basement bedroom and neighboring bathroom that seemed to us to be quintessentially mid-century modern. Well, it has wood paneling and a tile ceiling with gold flecks in it. The bathroom is pink and white, tiny and appointed like a railroad car (from the 1950s of course). I've been given me free rein to manage the decor and I have gone (some might say overboard) with the theme.

It's very hard to find a matched set of nightstands so I finally made some. These are of my own design. The legs are ready-made. The over sized handles were found at The Rebuilding Center in a bin, but they shined up nicely.


It's very hard to find a matched set of nightstands so I finally made some. These are of my own design. The legs are ready-made. The over sized handles were found at The Rebuilding Center in a bin, but they shined up nicely.

Likewise I couldn't find a small table and chairs. I ended up buying the chairs ($55/pair delivered)

Again the legs are store-bought. The construction is very simple and follows the trend at the time to leave the plywood edge exposed. To keep the thin appearance, here's how the leaves work from the underside.

Finally, the den. It used to look like this
 | ||||
| B |
But now it looks like this,
The bookcase is featured in this posting A Moving Case for Books. The floor is painted a chocolate brown. The 50s style rug form Overstock.com; the coffee table was $22 at an estate sale. The louvered sliding door to the left was a bargain at the ReBuilding Center. I think we paid $28 for both of them. They needed some cleaning up and one of the slats had to be replaced (I fashioned on out of old piece of cedar which matches nearly perfectly). The sliding track hardware is real barn door hardware salvaged from the farm and restored by me. There is also the vintage stereo featured in the posting de minimis.
And so our visit to the 1950s ends, unless you visit us that is.
Tuesday, September 6, 2011
A Moving Case for Books
Th eback half of our basement in Portland is dominated by a rather new oil furnace. We wanted to extend the guest area into a dual use family room. The issue was how to cover up the furnace and still provide service access annually. I also wanted to continue the 1950s theme, so just putting up a stud wall with a couple of doors to the furnace in it didn't quite measure up. I thought bookcasaees might do the trick so here, in animation, is my solution.

This is just an animation; a human has to do the work.
And yes, the rolling shelves would be top-heavy if it weren't for the counter weights on th bottom back.

This is just an animation; a human has to do the work.
And yes, the rolling shelves would be top-heavy if it weren't for the counter weights on th bottom back.
Saturday, July 30, 2011
Ravenswood
The Story of Ravenswood

Not so long ago, as the Earth reckons it, there came a fierce storm. The mighty walnut and its ebony winged sentinel, swayed to and fro, lashed by the gale-force winds and pelted by rain that rushed horizontally at them. They nonetheless stoically endured as they had many times before; the raven gripping the tree with its oversized talons and the tree gripping the earth with its gnarled roots.
The trees demise came suddenly. A bolt of lightning so large Zeus himself must have hurled it. The tree shivered from top to bottom and then in reverse exploded in flame as a concussive thunder clap peeled through the forest. The tree was split asunder and its two halves fell to either side with cracking, wrenching groan that ripped through the forest and was heard in villages more than a day’s walk away. And yet above the sound of pouring rain, over the fury of the racing wind, louder than heaven’s cannon bursts of thunder came a plaintive and final “CAAW. CAAW. CAAW.” For the Raven flew off, ringed in an electric-blue glow, and was not seen in those parts ever more.
On examining the remains of the great tree, it was discovered that the knot of the largest limb (the hardest part of this already hard wood) had been shattered. To the discerning eye, in the mass of kindling-sized sticks, there sat, fully formed, a certain number of wands of the highest caliber. It is one of these rare objects that sits before you now.
Mysteriously, as these wands came into possession of their rightful owners, there would be found, inside the sealed box, a single raven’s feather. A mystery since no such feather was placed there by the wand merchant. In time, as stories of the wand’s ability to foreshadow imminent danger emerged, the feather came to be understood as a sign from the great raven. That he travelled the earth still, ever the ebony-winged sentinel for his friend, the giant walnut tree and all that remained of it on earth; the wands.
This special wood is referred to now as “Ravenswood”. Handle it with care, use it with noble purpose, know its innate strength and be guided by its inner voice; that of the great raven.


Wednesday, March 23, 2011
New Handsaw Handle
There seems no end of broken and rusty old things around here to restore. One that finally made it to the top of the list was an old handsaw. Like other things left around here, it was probably of low quality when purchased new. In this case the lack of a stamp on one of the screws, the handle made of plywood and no markings save the number "8" on the blade all indicate "entry-level". But some people swear "they don't make steel like they used to," and so it may prove a worthy project in the end.

In considering a new handle for the saw I wanted to experiment with making the handle more 3-dimensional. Typically the handle is cut from a 3/4" blank and all the detail is in the outline and the hand-hole. The sides are flat. As you can see from the photo I started with a much thicker blank. A 1.5" piece of old, vertical-grain Doug fir.

And just like that, here's the finished product compared to the old handle. The form is roughly similar, but I added more curve to reveal more of the hidden shape of the blade.
These three photos show the top, bottom and three-quarter views and give a good idea of the amount of relief that was generated.

The blade was a rusty old thing that polished up reasonably well. One of a couple of broken teeth is visible in the bottom photo. I don't really need another hand saw, but I may have it re-toothed for the shear pleasure of using it.
In considering a new handle for the saw I wanted to experiment with making the handle more 3-dimensional. Typically the handle is cut from a 3/4" blank and all the detail is in the outline and the hand-hole. The sides are flat. As you can see from the photo I started with a much thicker blank. A 1.5" piece of old, vertical-grain Doug fir.

And just like that, here's the finished product compared to the old handle. The form is roughly similar, but I added more curve to reveal more of the hidden shape of the blade.
 |
| (click on image to show all 3 views) |
These three photos show the top, bottom and three-quarter views and give a good idea of the amount of relief that was generated.

The blade was a rusty old thing that polished up reasonably well. One of a couple of broken teeth is visible in the bottom photo. I don't really need another hand saw, but I may have it re-toothed for the shear pleasure of using it.
Saturday, October 2, 2010
Dragon
Alice asked for a dragon as decoration for the apex knee-brace on the garage. Well I just couldn't say no even though I have no skills in this area. I can barely carve a turkey let alone a block of wood. What started out as a plan to make simple "whirligig-like" silhouette has morphed. Here's a look at it sans claws in natural cedar. I plan to paint it red. Wings are copper.


Saturday, September 18, 2010
Marc's Secret Two Night Stands

For the craftsman home in Portland I built two night stands, but they have a secret. I don't ike all the clutter on the top of night tables, and to fit these would need to be small. The problem with putting stuff inside the cabinet is retrieving it while still in bed. My solution, a sliding door in each cabinet on the bed side
Thursday, July 8, 2010
Shields Up
Nothing happier than a well armed child.
Roman scutum.

Campbell admires his birthday gift.

The shield is made by gluing two 1/8" sheets of plywood together and then strapping them to a 55 gallon barrel until the glue sets. The shield will then hold its form. The boss in the center is a hub cap I had to buy and rivet onto a scrap of sheet metal. It's held in by 8 carriage bolts with acorn nuts showing. The "rivets" around the outside are wood plugs. The paint is the amazing Krylon 18k gold. There is more in paint costs than any other material. 1 can black primer, 2 cans red, 1 can gold, 1 can clear acrylic.
The pattern on the shield is drawn from real scutum elements. The bold riveted trim is greatly exaggerated for effect. The wings were drawn on the computer from a scan of real scutum wings, printed, cut-out and temporary adhesive applied to make a stencil. Then sprayed gold and then the black applied with a Krylon paint pen.
I'm only worried that I will have to top this by building a full sized catapult for Christmas.
Tuesday, January 26, 2010

Thursday, January 7, 2010
Sword Play
I'm becoming quite the wooden arms merchant. Campbell wanted to be Steve Jobs for Halloween. I dutifully made him a fake Apple badge, changed his shirt color to black and added glasses in Photoshop. He loved it. But as October neared its end he decided to be a knight instead. With only days to spare I concocted this rather imposing sword.

The tiles are 6", so you can see it's about 42" in length. The blade is a shaped piece of vertical grain Douglas Fir.

The handle and hilt are a sandwich of oak, the fir blade and the two "horns" made of plywood. It has a magnificent feel in the hand, with outstanding balance and swift action that left homeowners begging for mercy and surrendering their candy in generous amounts.
Saturday, January 2, 2010
Toolbox
Alice's 8-year old son, Campbell, got interested in woodwork. I planned to give him a simple toolbox, but as usual one thing led to another.


Other than buying the latches, it's all made of leftover bits and pieces. I don't have a toolbox this nice. I have one on order from myself. Version 2.0 of course.


Other than buying the latches, it's all made of leftover bits and pieces. I don't have a toolbox this nice. I have one on order from myself. Version 2.0 of course.
End Table
This was Alice's birthday gift. It's a companion to the WC table made of an old style wooden toilet tank to which we mounted 4 legs.


It's the first time I've worked with oak. Hard and heavy, but smells like fresh mown hay when cut. Delightful.
Gun Play
Speaking to my brother Andrew one day, I learned that when we were young I apparently made him a toy gun with removable parts and a box to carry it around in. I have no recollection whatsoever of this. Andrew said it was near and dear to him and that he used to carry it around pretending he was Carlos the Jackal. Then he surprised me by asking if I would make something similar for his son Atticus, age 5. This was this past summer, but in September I started in on the project. I went overboard.


Peace on Earth,
Marc
Subscribe to:
Posts (Atom)